Online Hilfe einrichten
HHier werden die Schitte beschrieben um die Online-Hilfe einzurichten.
Folder „Docs\de\“ erstellen ("de" ist die Sprache)
Beispiel:

Hier die JSON - Datei „docfx.json“ erstellen.
Inhalt der Datei
{
    "build": {
        "content": [{
            "files": [
                "**.md",
                "**.yml"
            ]
        }],
        "resource": [{
            "files": [
                "images/**.png",
                "images/**.jpg"
            ]
        }],
        "overwrite": [{
            "exclude": [
                "obj/**",
                "_site/**"
            ]
        }],
        "dest": "../_site/de-DE",
        "globalMetadataFiles": [],
        "fileMetadataFiles": [],
        "template": [
            "default"
        ],
        "postProcessors": [],
        "markdownEngineName": "markdig",
        "noLangKeyword": false,
        "keepFileLink": false,
        "cleanupCacheHistory": false,
        "disableGitFeatures": false
    }
}
Die Datei „index.md“ erstellen. (Inhalt / Start der Online Hilfe)
Beispiel:
# Willkommen
Diese Hilfe....
Die Yamel-Datei „toc.yml“ erstellen.
Beispiel:
- name: Startseite
  href: index.md
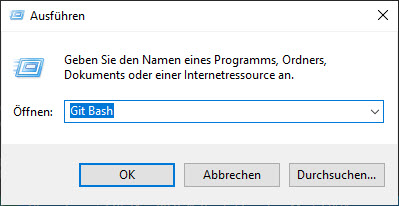
„Git Bash“ aufrufen
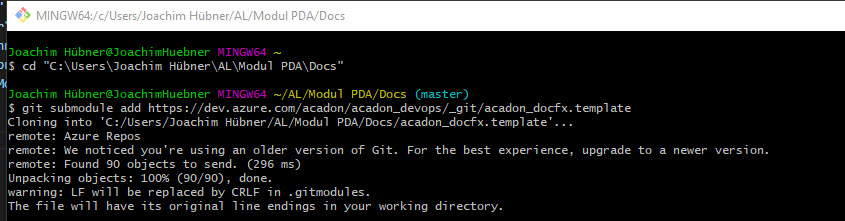
- Mit „cd [Folder]“ in das Verzeichnis wechseln, wo das Image installiert werden soll.
- Befehl „git submodule add https://[Rpro]“ ausführen.
Beispiel aufrufe:
Die Yamel-Datei „azure-pipelines.yml“ im Folder wo die „app.json“ ist erstellen.
Inhalt der Datei
<pre>
# Starter pipeline
# Start with a minimal pipeline that you can customize to build and deploy your code.
# Add steps that build, run tests, deploy, and more:
# https://aka.ms/yaml

pool:
  name: Azure Pipelines
  vmImage: 'windows-latest'
  demands:
  - npm
  - azureps

steps:
- task: chrismason.vsts-docfxtasks.docfx-extension-build-task.DocFxTask@0
  displayName: 'Create DocFx Documentation - DE'
  inputs:
    solution: Docs/de
    useTemplate: true
    templatePath: Docs/acadon_docfx.template

- task: chrismason.vsts-docfxtasks.docfx-extension-build-task.DocFxTask@0
  displayName: 'Create DocFx Documentation - EN'
  inputs:
    solution: Docs/en
    useTemplate: true
    templatePath: Docs/acadon_docfx.template

- task: AzureFileCopy@2
  displayName: 'AzureBlob File Copy'
  inputs:
    SourcePath: 'Docs/_site'
    azureSubscription: 'acadon_azure'
    Destination: 'AzureBlob'
    storage: 'docsacadon'
    ContainerName: '$web'
    BlobPrefix: 'ModulPDA/1.0.0.0/'
</pre>
In der "app.json" folgendes ergänzen
8. "contextSensitiveHelpUrl": "http://docs.acadon.de/ModulPDA/1.0.0.0/{0}/"
{0}/steht für die SprachePipelines ins DevOps erstellen
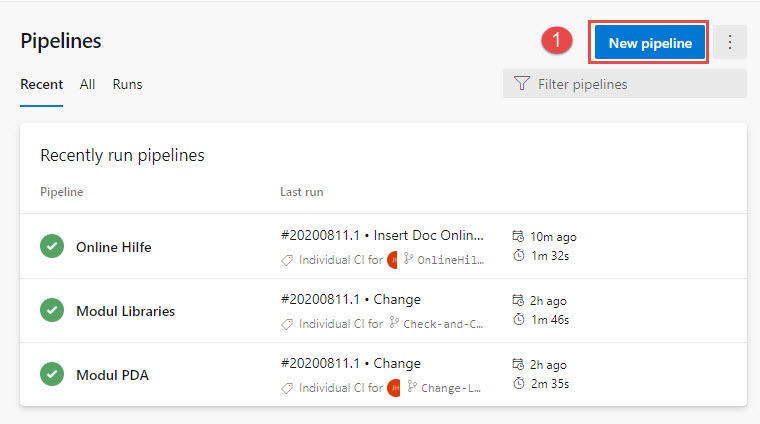
Schritt 1
Eine nue Pipelines erstellen.
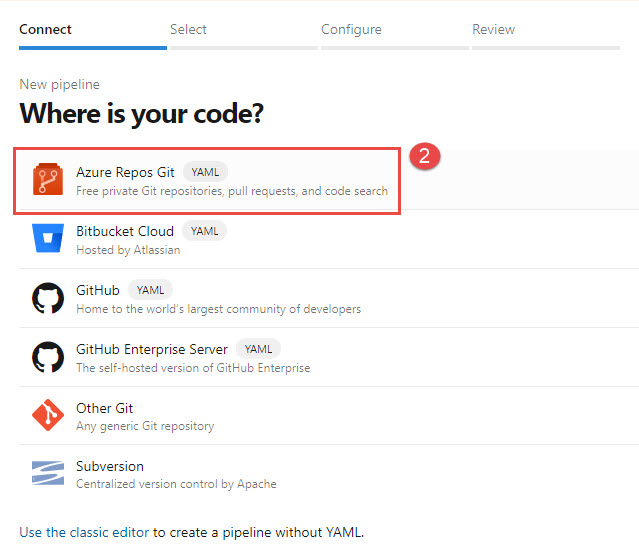
Schritt 2
Azure Repos Git auswählen.
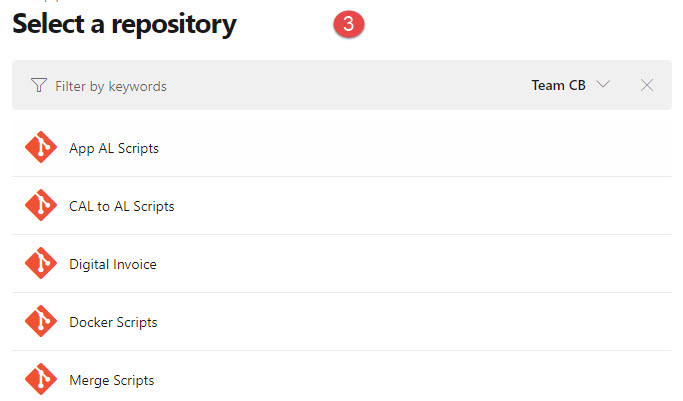
Schritt 3
Das entsprechende Repo auswählen.
Schritt 4
Die Configuration befindet sich in der "azure-pipelines.yml"
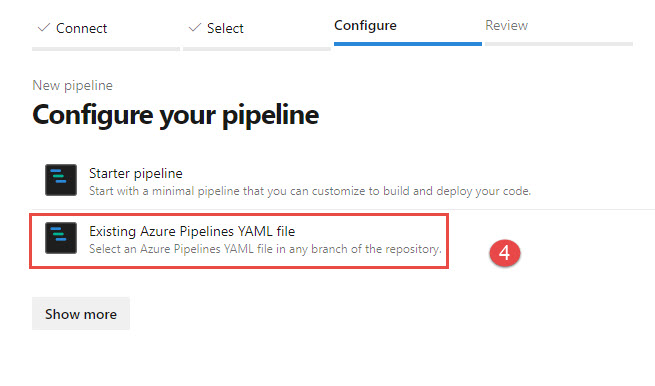
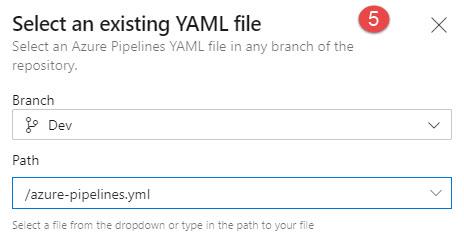
Schritt 5
Dort wird die Konfigurationsdatei ausgewählt.